Sunday 1 June 2014

A Crochet String Bag


3rd June 2014
OK, I have tested the pattern, and it works! But, it does only make a fairly shallow bag, so I have added a note into the instructions where to continue to make it deeper  

A lovely friend of mine was following a pattern for a string bag, which would not work out, when I tried to make it the same thing happened.  So while I was at a craft fair, I re worked the pattern and this is what I ended up with.  If you try it, please let me know if it works for you too ! There will be more photos to come, but I promised to get the instructions up today xxx 


I used  3.5mm hook and double knitting cotton yarn
The bag I made measures approximately 12" deep, but this will stretch when full 

Make 6 chain and join with a slip stitch.

Round 1 .Make 1 dble crochet into loop and then 6 chain, repeat 5 more times and slip into first dble crochet (6 loops)

Round 2 .Slip stitch long to the centre of the next chain,( 1 double crochet into the chain loop, chain 6, 1 dble crochet into the same loop, 6 chain) repeat 5 more times (12 loops)

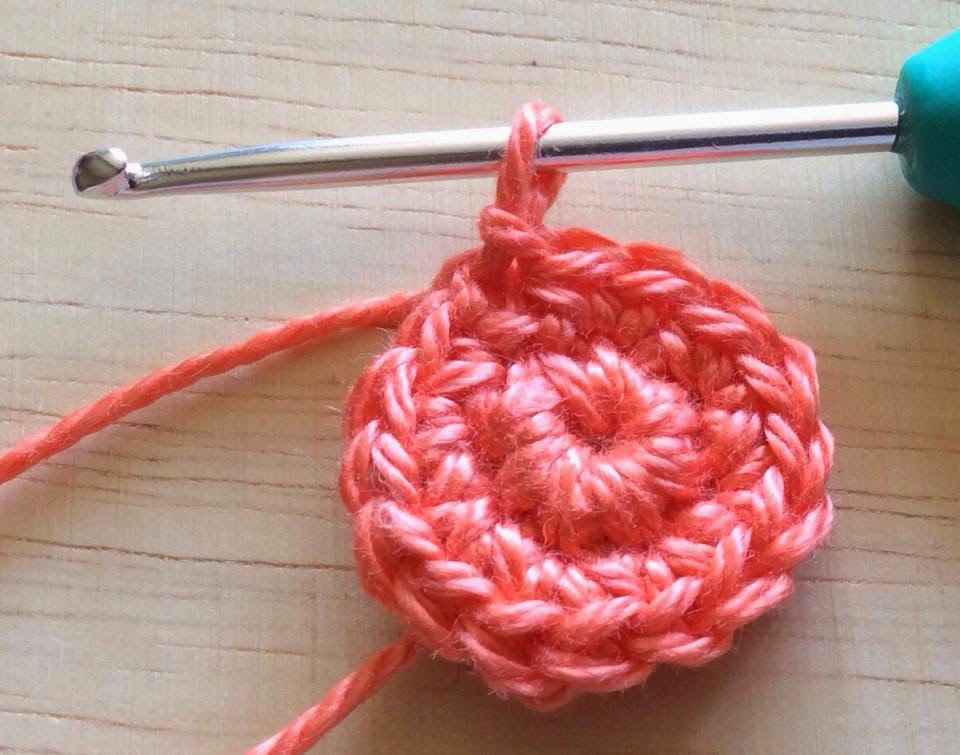
Round 3 .Slip along chain into centre of first loop, 1 dble crochet into loop, 6 chain, 1 dble crochet into same loop, *(6 chain, 1 dble crochet into next loop, x 2,  6 chain, 1 dble crochet into same loop)*Repeat from *to* 4 more times, and then 6 chain 1 dble crochet into next loop x 2, 6 chain and slip into beginning dble crochet. (18 loops)

18 loops
Round 4 .Slip along chain into centre of first loop, 1 dble crochet into loop, 6 chain, 1 dble crochet into same loop, *(6 chain, 1 dble crochet into next loop, x 3,  6 chain, 1 dble crochet into same loop)*Repeat from *to* 5 more times, and then 6 chain 1 dble crochet into next loop x 2, 6 chain and slip into beginning dble crochet. (24 loops)

24 loops
Round 5 – 16  Slip along chain into centre of first loop.1 dble crochet into loop (chain 6 dble crochet into next loop 23 times.  Then, chain 6 and slip into first dble crochet. (No more increasing, should remain at 24 loops.  TIP:  Mark the beginning of each round, it is easy to just keep going in a spiral!
16 rows completed

NOTE: Continue the last round until the bag is as deep as you require it to be.  The next 5 rows will only increase the depth by approximately 2"

Rounds 17 – 18 Slip along chain into centre of first loop.1 dble crochet into loop. 9 Chain, single crochet into next loop 23 times. Then, chain 9 and slip into first dble crochet. (No more increasing, should remain at 24 loops. 

Round 19 Slip into first loop loop and make 3 dble crochet into loop, 3 chain, 3 dble crochet into next loop, continue to end, slip into first dble crochet.
rows 17 -19 completed

Round 20 1 ch, 1 dble crochet into each of the three dble crochet, then 3 dble crochet into 3 chain space, continue to end and slip stitch into first dble crochet.

Round 21 1 ch, 1 dble crochet into each dble crochet to end, slip stitch to join.
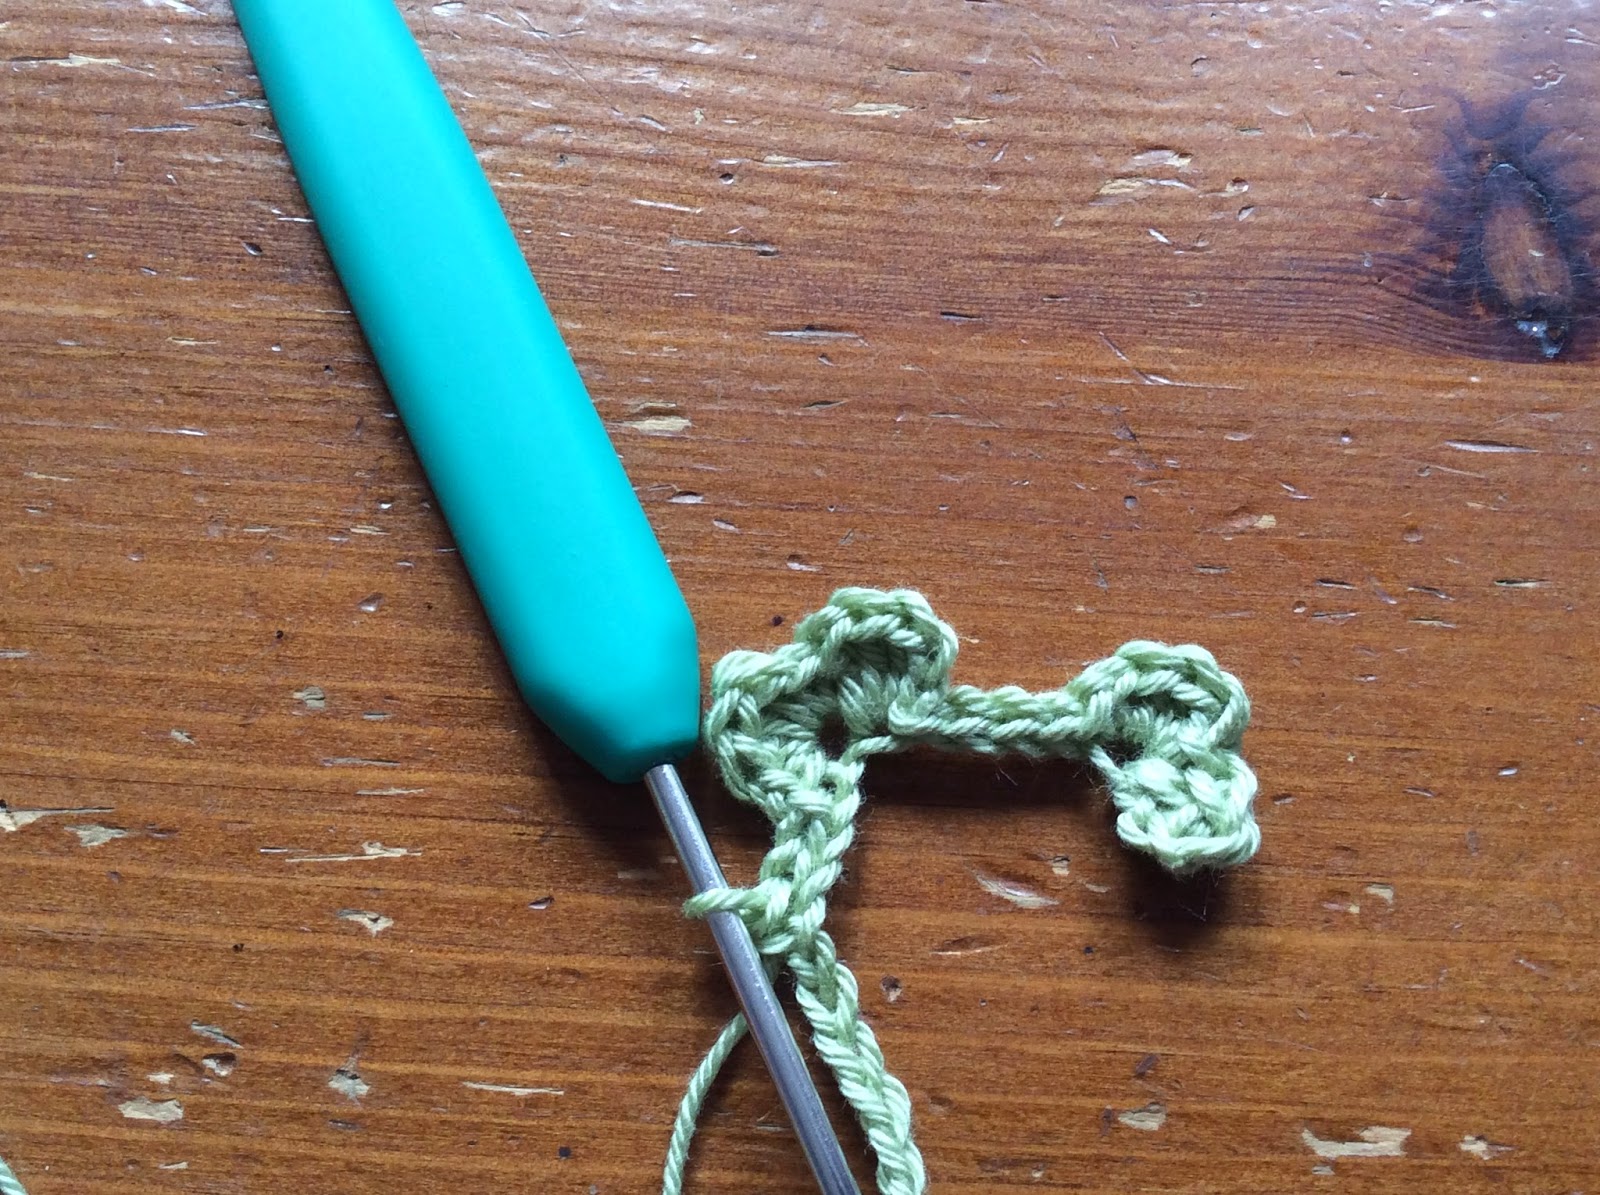
Handle

Round 22 Chain 1, turn, single crochet into next 4 single crochet, turn, and repeat until the handle is required length, (minimum of 7”), and then make another handle to match on the opposite side of the bag  

Finished empty bag
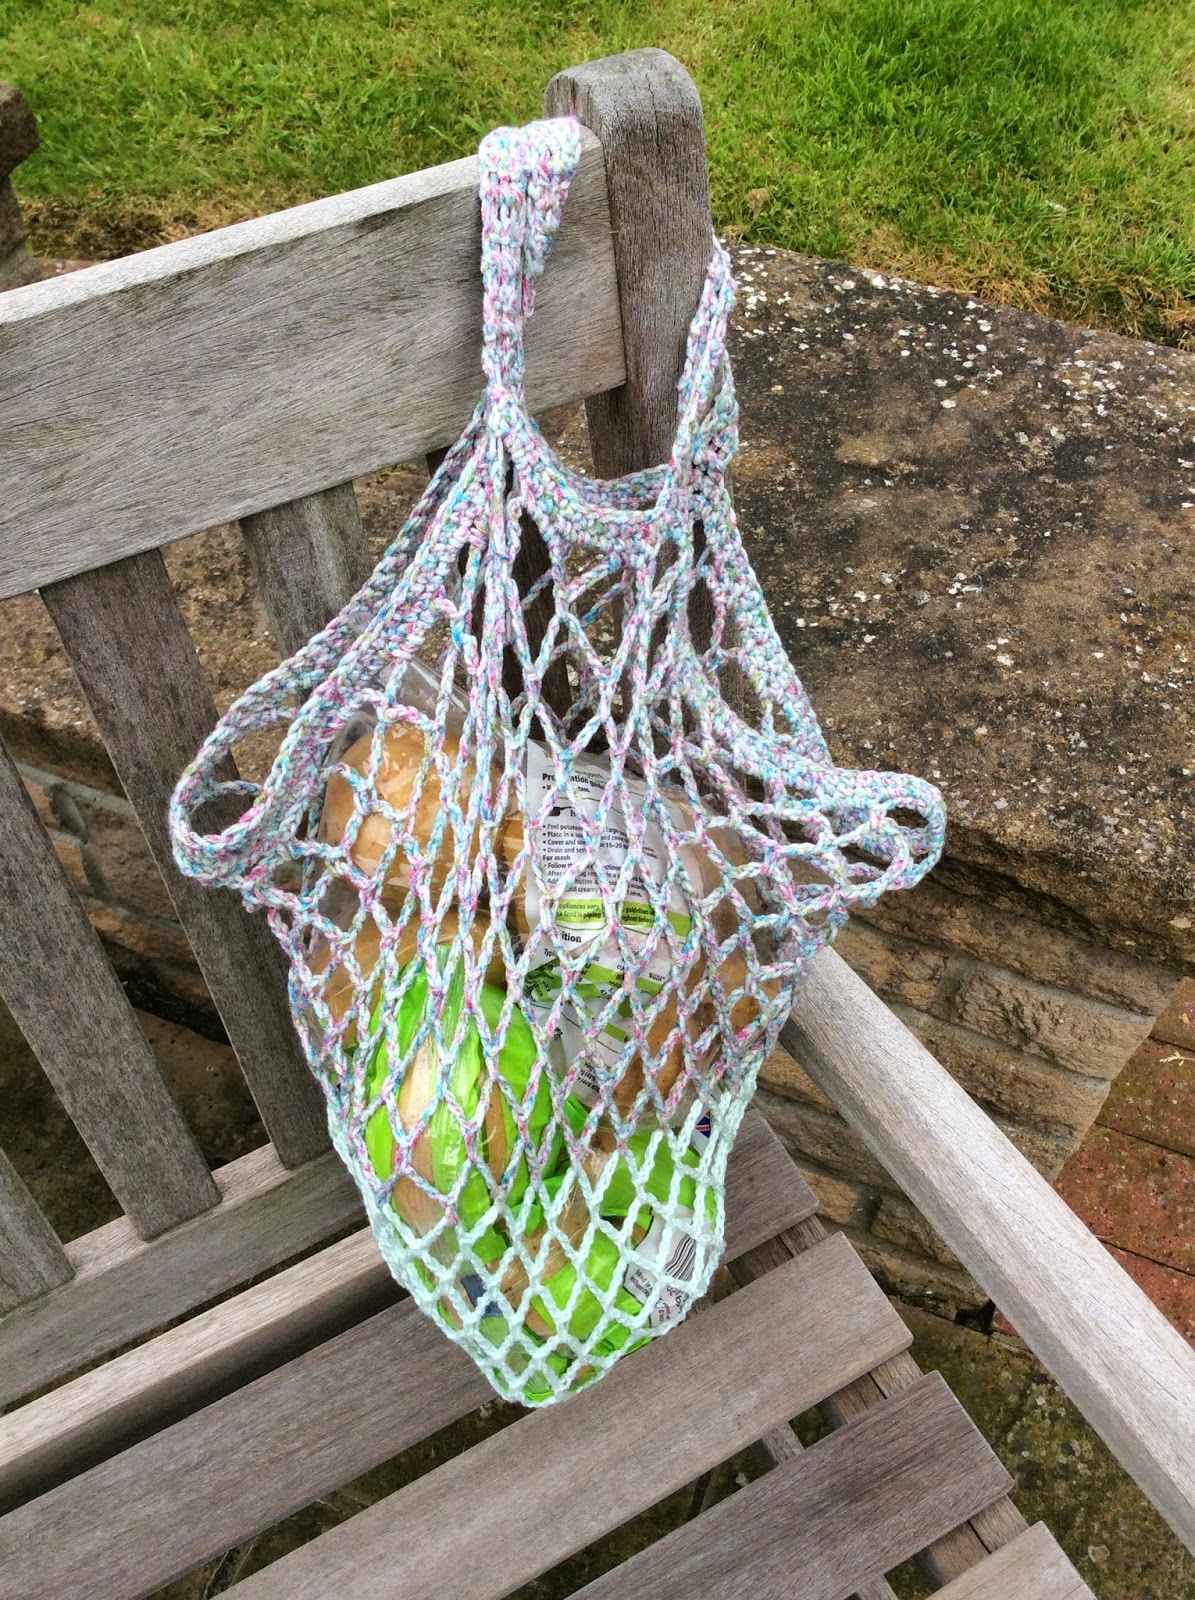
Holding 2.5kg bag of potatoes, just to give you an idea of volume


Wednesday 14 May 2014

crochet jug covers


I used 3ply cotton and UK size 2.00mm hook


I will be using UK crochet terms: 


    double (dc) 

    Half Treble ( ½tr)

    Treble (tr)

    Slip stitch (sl st)

    Chain stitch (ch)

   
If you want to use thicker thread and larger needle it will still work, but will obviously be larger!


Before you start, thread 16 beads onto your yarn!


Make 4 ch and join in a circle (TIP: as you crochet the next row, crochet over your cast on ‘tail’ and at the end of the row pull it up to tighten the centre hole.)


Round 1:  2 ch (counts as your first stitch), and then 7dc into the circle and join with a slip stitch to top of first stitch. (8 dc in total)


Round 2  2 ch (counts as your first stitch) 1 dc into the same space as the 2ch, 2 dc into each of the following dc. Slip to the top of the first stitch (16 dc in total) 


Round 3:  2 ch (counts as your first stitch) ½ tr into each of the dc and join with a slip stitch to the first stitch. (16   ½  trs in total)
 

Round 4:  3 ch (counts as your first stitch) 1 tr in the same space and then 2 trs in each ½ tr and slip stitch to top of first stitch (32 trs in total)
 

Round 5:  3 ch (counts as your first stitch) 1 tr into the same stitch as the 3ch, 1ch, miss 1tr, 2tr into next stitch (we’ll call this a pair). Join with slip stitch to the top of the first stitch. 16 pairs).


Round 6:  Slip stitch to middle of first pair, 3ch (counts as your first stitch) 1ch, 1 tr in the same space. Continue 1 tr, 1ch, 1 tr in the centre of each of the pairs.


Round 7:  Slip to middle chain of 1st pair 3ch (counts as your first stitch) 2 trs 1ch 3 tr all in the centre chain of the first pair. [3tr, 1ch, 3 tr in the centre of remaining pairs} (this forms a cluster) 16 clusters 

Round 8:  Slip stitch to middle chain of cluster and then continue as Round 7

Round 9:  3 ch for first stitch and then 3 further ch, 1 tr in the middle of the cluster, 3 ch, 1 tr in the space between  this and the next cluster. 32 ch spaces 
  

Round 10:  Slip stitch to next tr, 2ch for 1st  db. 8 ch, miss 1 space and 1 db crochet into the next tr, contine to the end of the round, slip into the first db.

Round 11:  Slip to centre of the ch and make a double crochet.  7ch, bring up the 1st bead and crochet it in, then 7ch and double crochet in the next loop. 7 ch and bring up the 2nd bead, carry on like this until the end of the round.


The finished item, a different colour I know, but I forgot to photograph the coral one before I gave it away!


Crochet Daisy Chain


Daisy Chain Bracelet

I used 4ply cotton, 2.50mm hook and it came out as a medium size
I left a long tail at cast on, to use to sew on a fastening button.
The chain needs to be in multiples of 5 + 2 (i.e. in this case 50 +2 = 52) the extra 2 are for your first turning chain


So, here we go! I am not very experienced at writing out crochet patterns, but hope this at least gives you an idea of how it works.


  • Make a chain of 52.  Turn  and into the 3rd chain from hook (3 treble, 1dble, 3 treble, 1dble)


  • *Slip stitch along 4 chains. Into the 5th chain (1dble, 3 treble, 1dble, 3 treble, 1 dble)*.  Slip stitch along the next 4 ch.  Continue from * to * to the end.


  • In the last stitch, after you have completed (1dble, 3 treble, 1dble, 3 treble, 1 dble) continue with 3treble, 1 dble, 3 treble, 1 dble to complete the flower.  Slip stitch along the 4 chain and into the ‘hole’ made on the previous row  (1dble, 3 treble, 1dble, 3 treble, 1 dble), continue along to the end and after the last  stitch, slip stitch to the top of the 2 chain turning chain.

 
  •  Chain enough to make a loop for your button to go through (I made 7 chain, and used small buttons). If you are sewing buttons/beads etc down the centre of the bracelet, leave a tail twice the length of the bracelet when you cast off and don't cut it off.  I found it easier this way, fewer ends to sew in! 


Monday 21 April 2014

English Paper Piecing Tutorial

This is just a guide to English Paper Piecing, but I hope it helps you take the plunge!


You will need paper hexagons - I like to use paper similar in weight to good writing paper, a needle needs to go through it easily, and it needs to support the fabric.

You will also need fabric which when cut gives you at least 1/4" ideally nearer to 1/2" seam allowance around the paper template. Don't forget that traditionally patchwork uses recycled fabrics, so shirts, dresses etc can be used.

  Place a paper hexagon in the centre of the wrong side of the fabric hexagon.


Fold the fabric over the template


 Use a knot in the end of the thread, and tack through the fabric and paper.


When you have covered all the templates, select one for the centre.


With the right sides of the hexagons facing, place 2 together, and sew together along one edge, using tiny over sewing stitches. 


I use a cream/off white thread for mine, it blends with most colours


Continue to add hexagons, sewing them together with the centre hexagon and up the first side of the neighbouring hexagon.


You may need to fold an attached hexagon in half to be able to easily sew it to its neighbour


When all the hexagons are sewn together, you have the first flower of a Flower Garden quilt.  You can continue to add to this as you find/borrow shirts, summer dresses from your friends & family.    It need not be a costly hobby, upcycling is the traditional patchwork. Just try and use fabrics of similar weights.

Once a hexagon is sewn to another on all 7 sides, you can remove the tacking, and then the papers.


The flowers can then joined together with a contrasting, in this case white, row of hexagons to form a quilt


Good luck and a warning, its addictive!